Ever wondered why the Seated Bicep Curl isn’t just another arm exercise but a crucial element in sculpting your arms to perfection?
With years of experience in strength training and biomechanics, we bring you evidence-based insights that are backed by the latest research in the fitness industry.
The seated bicep curl is more than just an alternative to its standing counterpart; it offers unique advantages in targeting muscle isolation and promoting consistent form.
In the following sections, you’ll learn the specific advantages of the seated bicep curl over traditional curls, how to execute the movement with precision for optimal results, and what equipment best suits different levels of experience.
Continue reading to elevate your arm training and make every rep count.
Tables of contents
1. Anatomy of the Bicep Muscle
Understanding the anatomy of the bicep is foundational to perfecting the seated bicep curl. Here, we will delve into muscle fibers and their types, explore the anatomy of the biceps brachii, and touch upon the supporting muscles in bicep exercises.
Understanding Muscle Fibers
The human muscle system comprises varied fiber types, each playing a unique role in movement and strength. By understanding these fibers, you can tailor your workouts for desired outcomes, be it endurance or power.
Type I: Type I muscle fibers, commonly known as slow-twitch fibers, are crucial for prolonged, endurance-based activities. Rich in capillaries and mitochondria, they efficiently utilize oxygen for energy, making them resistant to fatigue. While they don’t generate as much force as their counterparts, Type I fibers are foundational for stamina and muscle tone.
Type II: On the flip side, Type II, or fast-twitch fibers, come into play during short bursts of high-intensity activities. These fibers, abundant in glycolytic enzymes, primarily utilize anaerobic metabolism. They can generate significant force in short durations but fatigue more quickly than Type I fibers. Targeting Type II fibers is essential for those seeking explosive power and hypertrophy.

The Biceps Brachii
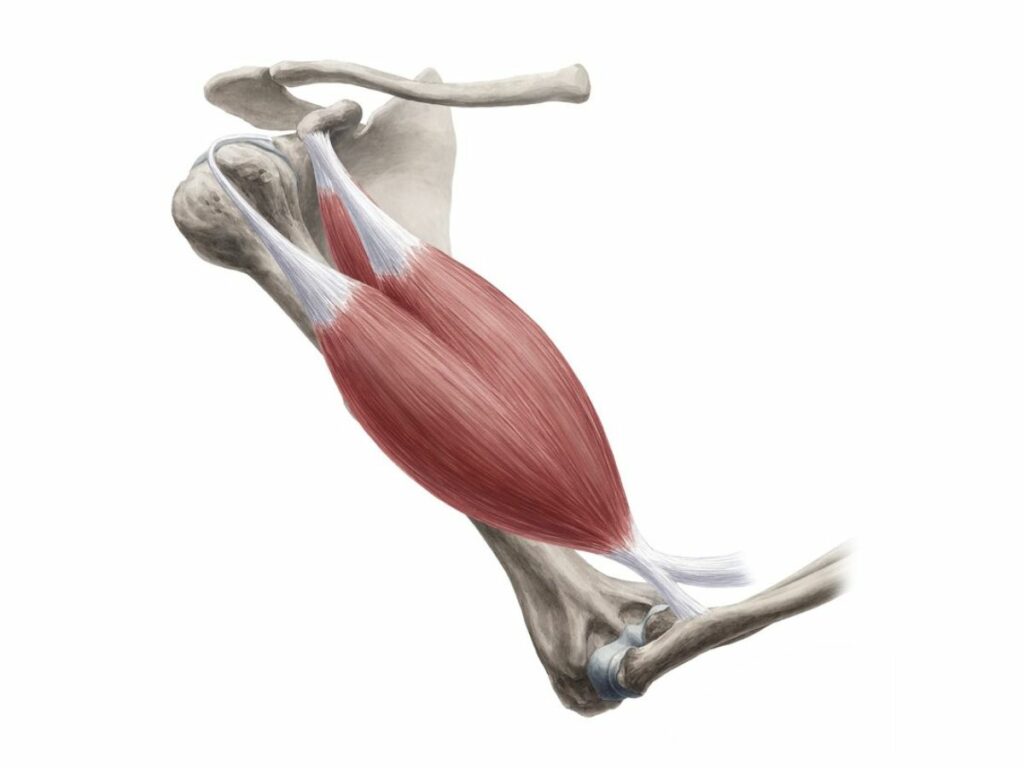
The biceps brachii, the muscle prominently visible when you flex your arm, has two major heads: the short head and the long head. Knowing the nuances of each can aid in targeted muscle development.
Short Head: The short head of the biceps brachii plays a pivotal role in arm flexion and forearm supination. When you’re targeting this part, exercises that keep your arms in front of the body, like preacher curls, are particularly effective.
Long Head: The long head contributes to both elbow flexion and shoulder joint stability. It’s this head that gives the bicep its peak. To emphasize the long head, exercises that position the arms behind the body, such as incline curls, are optimal.
Supporting Muscles in Bicep Exercises
While the biceps brachii is the star of the show in curls, several supporting muscles act in concert to facilitate movement. Recognizing these muscles can ensure balanced development and reduce the risk of imbalances or injury.
For instance, the brachialis, situated beneath the biceps brachii, assists in elbow flexion. Likewise, the brachioradialis, found in the forearm, aids in flexing the elbow, especially when the forearm is in a neutral position. Ensuring these muscles are also engaged and strengthened can amplify the benefits of your bicep exercises.
2. Benefits of Seated Bicep Curls
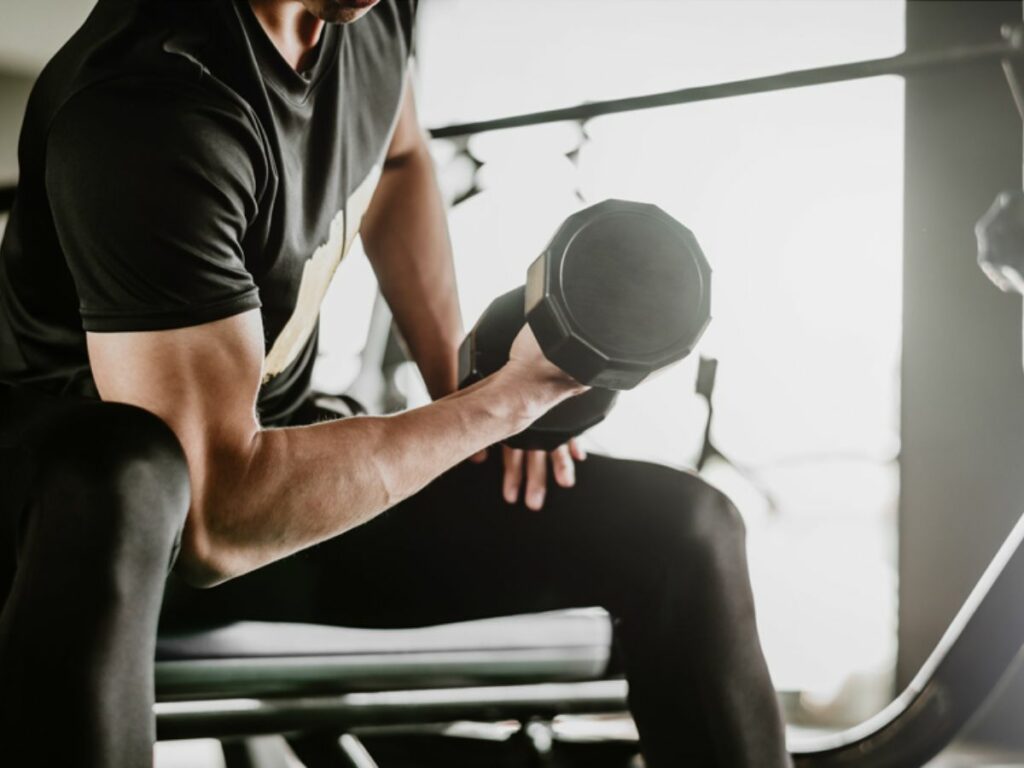
When it comes to isolating the biceps for growth and strength, seated bicep curls present undeniable advantages. In this section, we’ll elucidate the specific benefits of this position, highlighting the reasons it holds a prized spot in many fitness routines.
Isolation of the Bicep Muscle
One of the crowning benefits of the seated position is the impeccable isolation it offers to the bicep muscle. Standing curls, while effective, often allow other muscle groups to inadvertently share the load. However, when seated, the chances of recruiting secondary muscles, like the deltoids or traps, diminish considerably.
This isolation ensures that the biceps bear the brunt of the resistance, fostering targeted hypertrophy and strength. For those aiming for pronounced bicep development, integrating seated curls is a strategic move.
Stability and Reduced Back Strain
The seated position inherently promotes stability, anchoring the body and minimizing unwanted movement. This not only results in a more controlled and effective curl but also reduces the risk of lower back strain.
In a standing curl, there’s a temptation to arch the back or sway, especially when lifting heavier weights. Such compensations can strain the lumbar region. Seated curls, by design, help maintain a neutral spine, safeguarding against potential back issues.
Muscle Activation and Tension
The seated position offers an uninterrupted tension pathway to the biceps. As you curl the weight, the absence of momentum ensures that the biceps are under constant tension, a critical component for muscle growth.
Additionally, with stability enhanced, you can focus on the quality of each repetition. This enhanced muscle activation, combined with sustained tension, amplifies the muscle-building potential of each curl.

3. Proper Equipment and Seating Position
Selecting the right equipment and ensuring a proper seating position is paramount to extract the full benefits of the seated bicep curl. This section offers a deep dive into equipment choices and nuances of seating that can make or break the effectiveness of exercise.
Choosing the Right Equipment
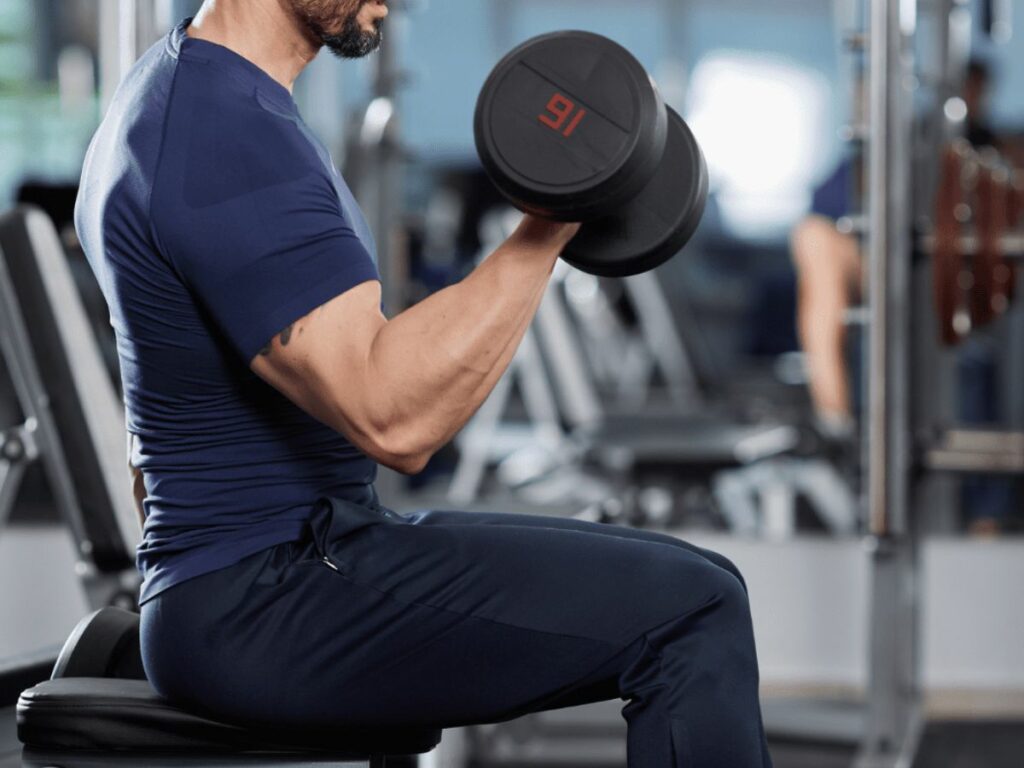
The world of weights is vast, and selecting the right equipment can significantly influence the effectiveness of your curls.
Weight Amount: Choose a weight that’s challenging but allows for proper form. If you can’t maintain form for at least 8 reps, it’s too heavy.
Dumbbell vs. Barbell: Dumbbells allow for a greater range of motion and can help address muscular imbalances. Barbells, on the other hand, let you load more weight, beneficial for raw strength development.
Grip Texture: Ensure the grip is textured for a secure hold, especially when hands become sweaty.
Bench Angle
The angle of your bench plays a subtle yet significant role in bicep engagement. A vertical backrest facilitates a standard seated curl, targeting both bicep heads evenly. An incline, where the backrest is slightly reclined, emphasizes the long head, while a decline or preacher position accentuates the short head.
According to Maxi Nutrition, regularly varying the bench angle can lead to comprehensive bicep development, ensuring both heads receive equal attention over time.
Wrist Position and Grip
Your wrist position and grip technique can influence the force exerted on the biceps. A supinated grip (palms facing up) maximally activates the biceps. A hammer grip (palms facing each other) integrates the brachialis and brachioradialis more.
Ensuring the wrists remain neutral and avoiding excessive bending can prevent undue stress, facilitating a safer and more effective curl.
4. Step-by-Step Technique
To truly master the seated bicep curl and harness its full potential, understanding each step of the technique is essential. Detailed below is a granular breakdown of every phase of this exercise, ensuring you maximize bicep activation while maintaining safety.
Step#1 Initial Setup
Before even picking up the weights, proper positioning sets the stage for an effective curl.
Seat Selection: Opt for a bench with a vertical backrest for support. Sit down, ensuring your back is flush against the backrest.
Feet Placement: Place your feet firmly on the ground, shoulder-width apart. This provides stability, ensuring minimal swaying during the exercise.
Grip Selection: Choose between a supinated grip (palms facing upward) for maximum bicep activation or a hammer grip (palms facing each other) to incorporate more of the brachialis and brachioradialis.
Step#2 Executing the Curl
With the initial setup done, it’s time to delve into the curl itself.
Lifting Phase (Concentric): With the weights in hand, keep your elbows tucked close to your torso. Engage the biceps, curling the weights upwards. Ensure smooth motion without jerking or using momentum. As you near the top, squeeze the biceps for maximum contraction.
Peak Hold: At the peak of the curl, pause for a moment. This is where you squeeze the biceps, intensifying muscle engagement.
Lowering Phase (Eccentric): Control the descent of the weights. Do not merely let them drop. This controlled lowering phase, often overlooked, is crucial for muscle growth.
Step#3 Resetting for the Next Repetition
After one rep, it’s not just about diving into the next. Resetting ensures you maintain form and effectiveness throughout all your reps.
Full Extension: Ensure your arms reach a full extension at the bottom, prepping the biceps for the next curl.
Breathing: Before the next repetition, take a brief moment to regulate your breathing. Inhale deeply as you begin the next curl.
Posture Check: Quickly ensure that your back remains flush against the bench, your feet grounded, and your core slightly engaged. This check ensures that as fatigue sets in, your form doesn’t waver.
By breaking down the seated bicep curl into these detailed steps, you ensure not just effective muscle activation, but also reduce the risk of injury or strain. Mastery of each phase ensures that every repetition is a step towards your goal.
5. Seated vs. Standing Bicep Curls
While both seated and standing curls have their merits, discerning the nuances between them can help you make informed decisions tailored to your goals. Let’s dissect the differences in muscle activation and the dynamics of energy expenditure and stability in each stance.
Differences in Muscle Activation:
Seated: In the seated variant, the primary advantage is the pronounced isolation of the bicep. With the back supported and the body stable, there’s minimal engagement of stabilizing muscles like the deltoids or core. This isolation directs the majority of the load squarely onto the biceps, optimizing hypertrophy.
Standing: The standing curl, while still targeting the biceps, calls upon a host of stabilizing muscles. The core, deltoids, and even the lower body engage in maintaining balance. While this means slightly reduced isolation for the biceps, it offers a more holistic workout and can help improve functional strength and balance.
Energy Expenditure and Stability:
Seated: The seated position inherently offers superior stability due to the grounded nature of the stance. This stability means fewer muscles work to stabilize the body, leading to slightly lower overall energy expenditure compared to the standing variant.
Standing: Standing bicep curls require more energy. With numerous muscles engaged to maintain posture and balance, there’s an uptick in caloric burn.This increased energy expenditure, combined with the need to stabilize oneself, offers a compound exercise experience, melding strength and balance training.
6. Common Mistakes and How to Avoid Them
Like all exercises, the seated bicep curl comes with its set of pitfalls. Identifying common mistakes and implementing corrective strategies can drastically enhance the exercise’s efficacy and safeguard against potential injuries.
Swinging or Using Momentum
According to Livestrong, frequently, individuals tend to rely on momentum when they opt for a weight that’s excessively challenging. Swinging the weight up not only reduces muscle engagement but also increases the risk of injury.
To avoid this, maintain a controlled tempo throughout the movement. Ensure your elbows remain stationary and close to your torso. If you find yourself swinging, it might be an indication that the weight is too heavy. Reduce it, prioritize form, and gradually progress.
Not Achieving Full Range of Motion
Cutting your curl short or not extending the arm fully at the bottom can hamper muscle development. Full range of motion ensures maximal muscle fiber activation, leading to comprehensive bicep development.
Focus on curling the weight all the way up, squeezing at the top, and then fully extending the arm at the bottom. This complete movement ensures both the concentric and eccentric phases are maximized.
Neglecting the Eccentric Phase
The lowering phase of the curl, known as the eccentric phase, is equally crucial for muscle growth. Neglecting this phase or letting the weight drop quickly is a missed opportunity.
Control the descent of the weight, maintaining a consistent tempo. This controlled eccentric movement causes microtears in the muscle fibers, pivotal for muscle repair and growth.

7. Incorporating Seated Bicep Curls into Your Routine
Mastering the seated bicep curl is only half the journey; the other half is effectively weaving it into your workout routine. From setting clear objectives to understanding its synergy with other exercises, this section will guide you on making the seated bicep curl a mainstay in your regimen.
| Aspect | Steps to Incorporate Seated Bicep Curls |
| Exercise Description | Seated bicep curls are an effective isolation exercise that targets the biceps. You’ll need dumbbells or a barbell for this exercise. |
| Equipment Needed | Dumbbells or barbell |
| Proper Form | Sit on a bench with back support, feet flat on the floor. Hold the weights with an underhand grip, palms facing upward. |
| Keep your elbows close to your sides throughout the movement. | |
| Start with your arms fully extended, then curl the weights upward while exhaling. | |
| Sets and Repetitions | Start with 3 sets of 10-12 repetitions. Adjust weight as needed for your fitness level. |
| Warm-Up | Always warm up with light cardio and dynamic stretches to prepare your muscles. |
| Incorporating into Routine | Include seated bicep curls in your upper body or arm-focused workout routine. |
| Rest Between Sets | Allow 1-2 minutes of rest between sets to recover. |
| Progression | Gradually increase the weight or repetitions as you get stronger. |
| Proper Cooling Down | Finish your workout with static stretching to improve flexibility and reduce muscle tension. |
| Safety Precautions | Use proper form to prevent strain or injury. |
| Start with a weight that allows you to complete your desired reps with good form. | |
| Benefits | Strengthens the biceps and forearms. |
| Can help improve arm aesthetics and functional strength. | |
| Variations | You can perform seated hammer curls for a variation, using a neutral grip. |
| Try alternating arms for an additional challenge. |
Hypertrophy and Strength
Your overarching fitness objective largely determines your approach to the seated bicep curl. Those chasing muscle hypertrophy should focus on moderate weights that allow for higher repetition ranges (typically 8-12 reps). This rep range promotes muscle exhaustion, a key driver for growth.
Conversely, if raw strength is your goal, then lifting heavier weights in a lower rep range (around 4-6 reps) is the way forward. This targets the fast-twitch muscle fibers responsible for explosive strength. No matter your goal, ensuring a full range of motion and impeccable form is non-negotiable.
Seated Curls with Other Exercises
Strategic exercise pairing can amplify the results of your workouts. The seated bicep curl, being an isolation movement, can be effectively paired with compound exercises for a balanced workout session.
For instance, incorporating seated bicep curls after a compound pulling movement like rows or pull-ups can be highly effective. This ensures the biceps, already activated from the compound exercise, are then isolated for targeted growth.
Frequency, Sets, and Reps
To capitalize on the benefits of the seated bicep curl, integrating it into your routine 2-3 times a week is typically advised. This frequency ensures adequate stimulus for growth while also allowing for muscle recovery.
During each session, performing 3-4 sets of curls, adhering to the rep range that aligns with your specific goal (be it strength or hypertrophy), can yield robust results. Remember, rest periods between sets are crucial, ranging from 60-90 seconds, ensuring muscle recovery and optimal performance in subsequent sets.
Conclusion
The seated bicep curl is more than just an exercise. By understanding its intricate details and the science behind each motion, you’re not merely lifting weights; you’re engaging in an informed dialogue with your body.
Whether you’re a seasoned bodybuilder looking to refine your technique or a fitness enthusiast eager to maximize muscle gains, the seated bicep curl, when executed correctly, holds the promise of transformative results. As with any exercise, dedication and a keen understanding of one’s body are the keys to success. We value your feedback and are here to help. Reach out to us and we’ll go the extra mile to assist you.
Related articles:


