


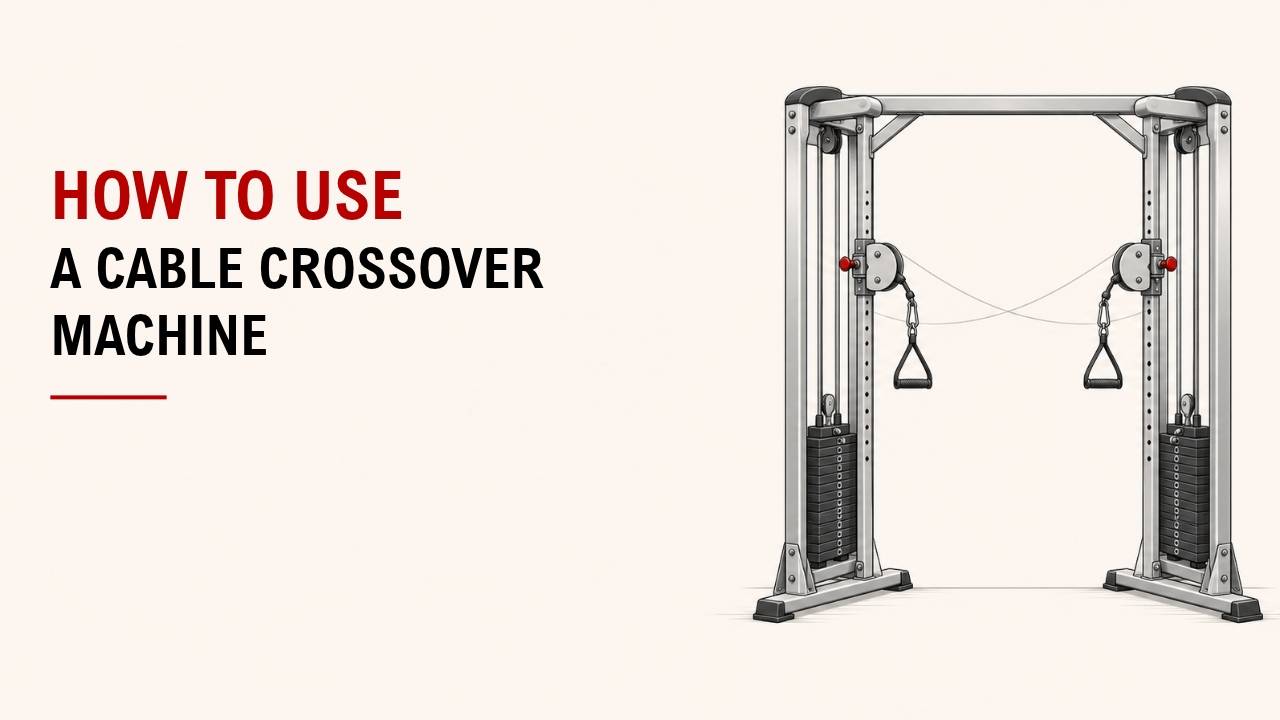

Want to build your chest with a cable crossover machine? Proper setup and form help you train more effectively.
Adjust the pulleys, choose a lightweight, and pull the handles together in front of your chest. Return slowly and repeat with control.
As an Exercise Physiology & Biomechanics Expert at YR Fitness, I specialize in proper exercise movement and machine setup. I’ve seen how small adjustments help beginners train safely and confidently.
Below are seven simple steps to use a cable crossover machine correctly. Follow them to get more from your chest workout.
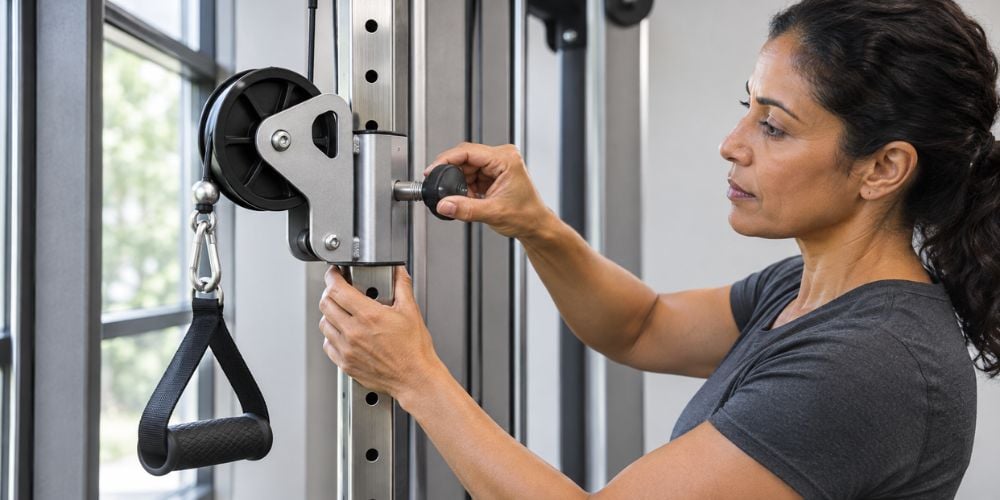
1. Adjust the Cable Pulleys
Start by setting the pulleys to the correct height. For a high-to-low cable crossover, position both pulleys slightly above shoulder height.
Here’s how:
- Stand between the two cable towers.
- Locate the pulley adjustment pins.
- Raise both pulleys to the same height.
- Lock the adjustment pins securely.
- Check that both cables move freely.
Why does pulley height matter?
Pulley height changes the direction of resistance and the angle of your chest exercise. Higher pulleys create a downward pulling motion, while lower pulleys let you pull upward.
The National Academy of Sports Medicine (NASM) also explains how pulley position, body alignment, and controlled movement affect cable crossover technique.
Start with a comfortable pulley height before trying different angles.
2. Choose the Right Weight
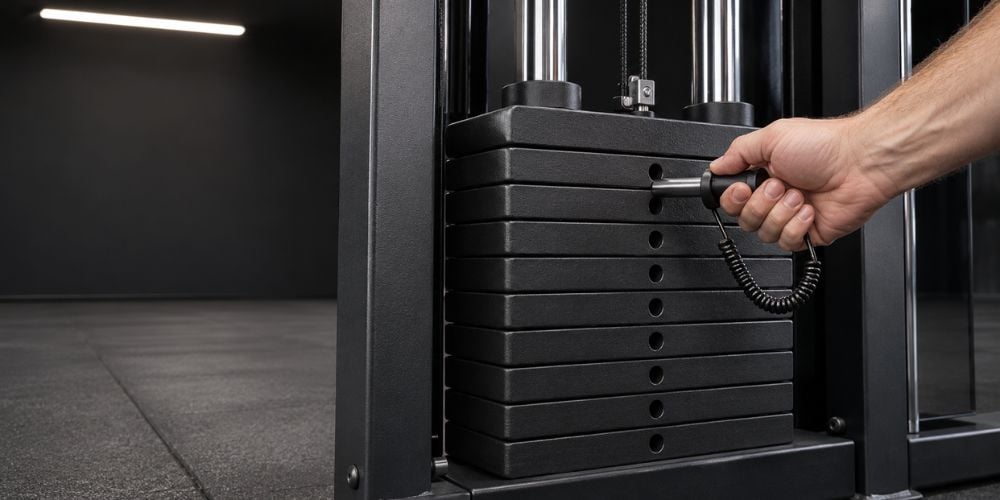
Choose a weight you can control without swinging your body. You don’t need heavy resistance to make cable crossovers effective.
Follow these steps:
- Select a light weight on both stacks.
- Use equal resistance settings on both sides.
- Gently pull the handles to test the resistance.
- Lower the weight if your shoulders or body start swinging.
- Increase resistance gradually as you become stronger.
How heavy should you go?
Choose a weight that allows you to complete 10–15 repetitions with good form. The last few reps should feel challenging without forcing you to change your technique.
Experience Level | Sets | Repetitions |
Beginner | 2 | 10–12 |
Intermediate | 3 | 10–15 |
Advanced | 3–4 | 10–15 |
These are practical starting ranges, not strict requirements. The American College of Sports Medicine (ACSM) provides further guidance on resistance training and exercise progression.
Quick tip: If you can’t complete your reps without swinging, reduce the weight.
3. Grab the Handles and Position Your Body
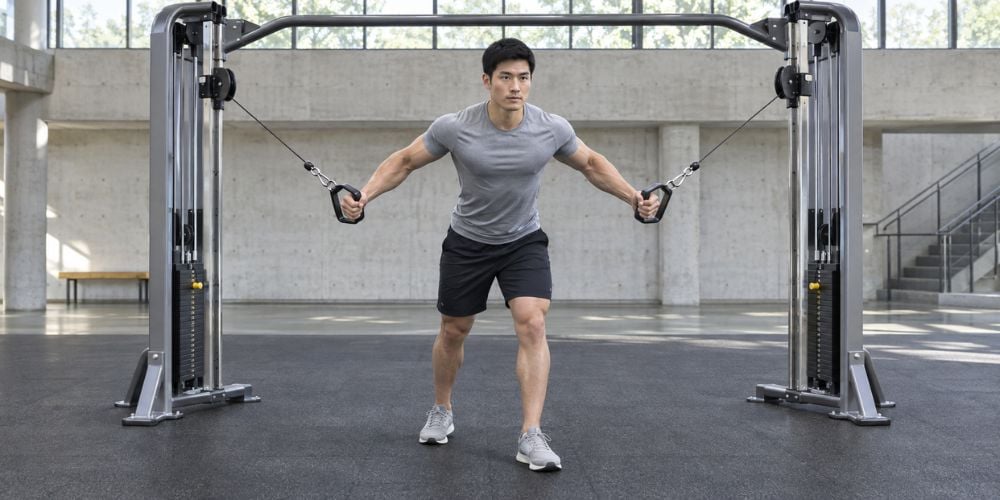
Your standing position helps you stay balanced while moving the cables. A stable stance also lets you focus on your chest muscles.
Here’s what to do:
- Grab one handle in each hand.
- Stand in the center of the machine.
- Step one foot slightly forward.
- Bend your knees a little.
- Tighten your core and keep your back neutral.
- Lean forward slightly from your hips if needed.
Keep both feet firmly planted throughout the movement.
Should you stand upright or lean forward?
Both can work depending on the cable angle. For a high-to-low crossover, a slight forward lean can help you stay balanced.
I’ve noticed that beginners often struggle when their stance is too narrow. Placing one foot forward usually makes the exercise easier to control.
Why Machine Stability Matters
A stable cable crossover machine helps you maintain balance and perform smooth repetitions. Secure adjustment points and freely moving pulleys also make the exercise more comfortable.
At YR Fitness, we design commercial strength equipment with durable frames, adjustable components, and smooth cable systems. If you’re comparing cable machines for your training space, explore our equipment to see which features support stable, comfortable workouts.
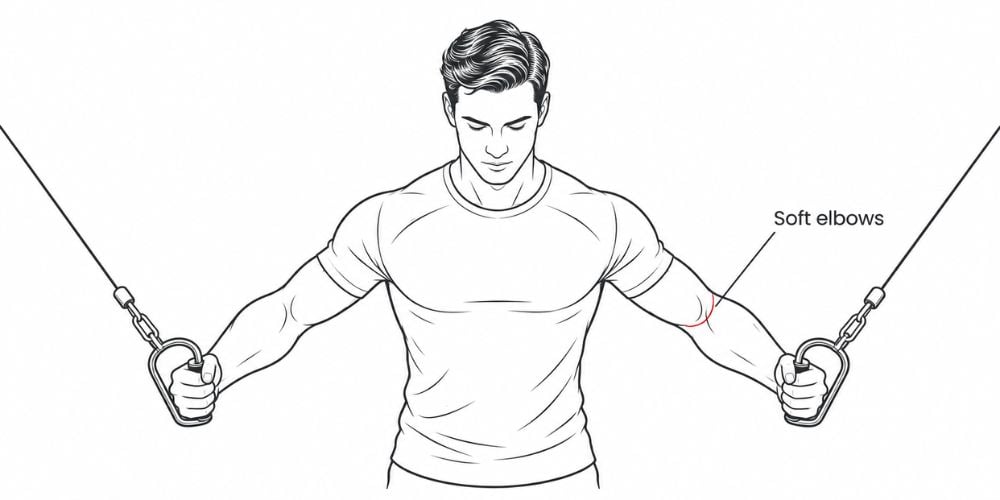
4. Set Your Arms in the Starting Position
Before pulling the handles together, position your arms correctly. This helps your chest muscles work through a comfortable range of motion.
Follow these steps:
- Hold the handles with your palms facing inward.
- Open your arms out to your sides.
- Keep a slight bend in your elbows.
- Maintain the same elbow angle throughout.
- Keep your shoulders relaxed and away from your ears.
- Avoid stretching your arms too far behind your body.
Your hands should stay within a comfortable range without causing shoulder discomfort.
Should your elbows be straight?
No. Keep them slightly bent to avoid unnecessary stress on your elbows and shoulders.
Think of your arms forming a wide hugging shape. This makes it easier to focus on your chest instead of turning the exercise into a press.
5. Pull the Handles Together
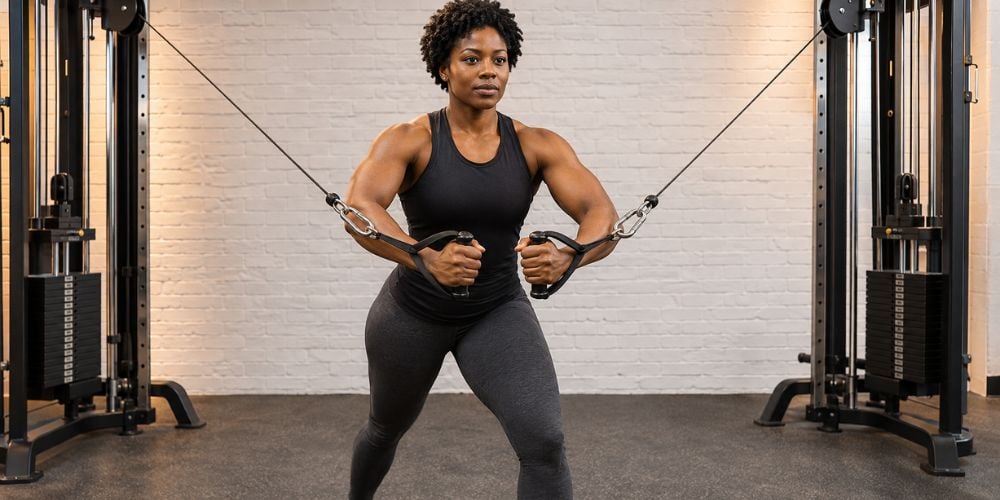
Now, bring both handles forward and inward using your chest muscles. Keep your body steady instead of swinging to move the weight.
Here’s how:
- Take a breath before starting.
- Pull both handles forward and inward in a wide arc.
- Keep your elbows slightly bent.
- Bring your hands together in front of your lower chest.
- Exhale as you pull the handles together.
- Pause briefly when your hands meet.
Do your hands need to cross over each other?
No. Bringing your hands together is enough to perform an effective cable fly.
You can allow a slight crossover if it feels comfortable, but don’t force the movement. The goal is to keep your chest working without placing unnecessary stress on your shoulders.
The American Council on Exercise (ACE) identifies the bent-forward cable crossover as an effective chest exercise in its discussion of chest-training research.
Quick tip: Focus on bringing your upper arms together rather than pulling with your hands.
6. Slowly Return to the Starting Position
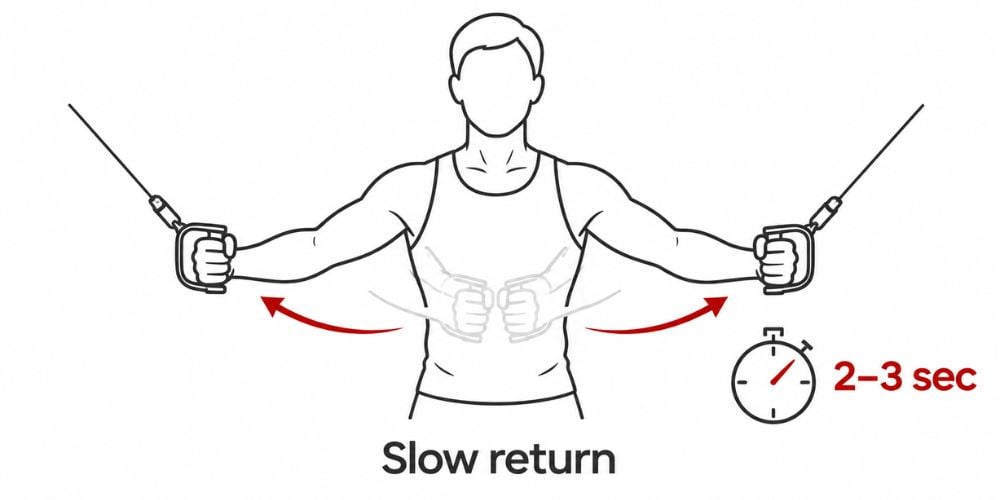
Don’t rush when returning the handles to the starting position. Your chest muscles continue working as you control the cables moving apart.
Follow these steps:
- Slowly open your arms to the sides.
- Keep your elbows slightly bent.
- Inhale as your arms move outward.
- Maintain tension on the cables.
- Stop when you feel a comfortable chest stretch.
- Keep your upper body steady.
Take about 2–3 seconds to return to the starting position. This helps you control the resistance and prevents the weight stacks from dropping suddenly.
Why should you return slowly?
Your chest muscles work as they resist the cables pulling your arms apart. A controlled return also helps you maintain better shoulder positioning.
I often see beginners focus only on bringing the handles together. Slowing down the return helps them control the entire movement instead of just half the repetition.
7. Repeat for the Recommended Sets and Reps
Once you understand the movement, complete your planned repetitions. Keep the same controlled technique from your first rep to your last.
Here’s a simple workout to follow:
Workout Detail | Recommendation |
Exercise | High-to-low cable crossover |
Sets | 2–3 for most beginners and intermediates |
Repetitions | 10–15 per set |
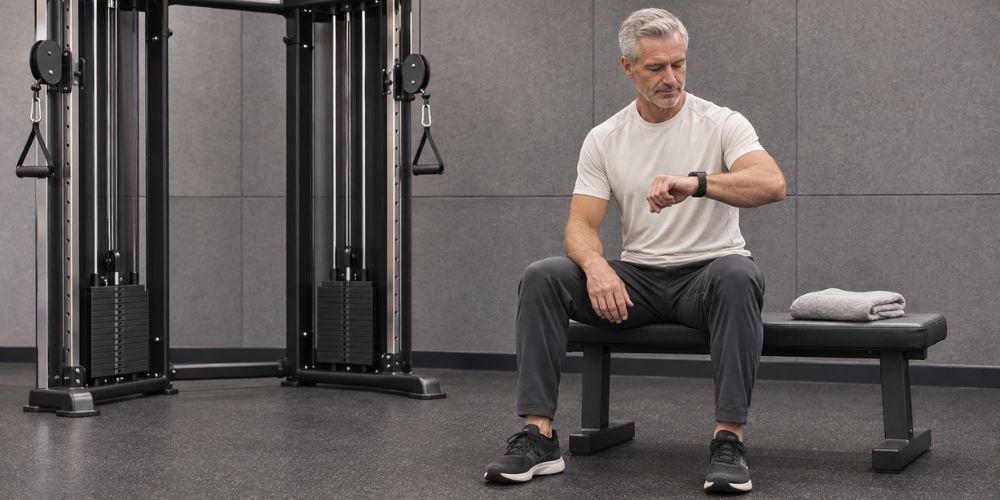
Rest time | 45–90 seconds |
Movement speed | Controlled pull, slow return |
Main muscles | Pectoralis major (chest) |
How to complete your workout:
- Perform 10–15 controlled repetitions.
- Return the handles safely to their resting position.
- Rest for 45–90 seconds.
- Repeat for the remaining sets.
- Increase resistance only when your form stays consistent.
How do you know you’re doing it correctly?
You should feel your chest muscles working without sharp pain in your shoulders or elbows. Your body should stay steady, and both arms should move smoothly.
If you start swinging or leaning too far forward, lower the weight. Proper form matters more than lifting heavier resistance.
One more thing: Don’t rush to increase the weight after one good workout. Build consistency first, then make small adjustments as you become stronger.
Conclusion
Using a cable crossover machine is simple once you understand the setup and movement. Adjust the pulleys, choose the right weight, position your body, pull the handles together, and return slowly.
Start with light resistance and focus on controlled repetitions to build chest strength.
If you’re looking for durable cable machines for a training space or fitness facility, explore YR Fitness strength equipment to find options designed for smooth, reliable workouts.
Related articles:



