








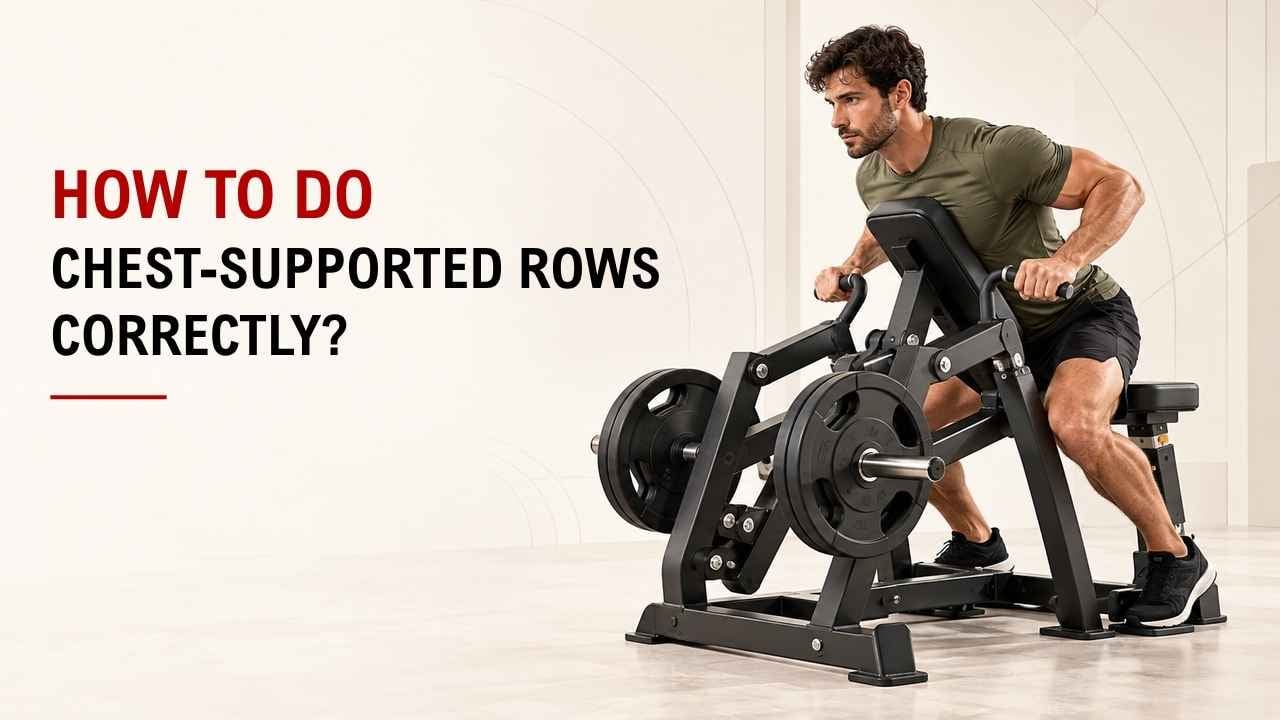

Have you ever used a chest-supported row and wondered if your seat, grip, or elbow position was right? A few small setup mistakes can make it feel awkward.
The simple answer is: keep your chest against the pad, pull the handles toward your lower ribs, squeeze your back, and lower the weight slowly. Use a weight you can control from start to finish.
As the founder and chief designer of YR Fitness, I have spent decades working with strength equipment and movement paths. In my experience, better positioning usually helps more than simply adding another plate.
Below, I will show you how to set up the machine, perform each rep, avoid common mistakes, and choose your grip, sets, and reps. Keep scrolling and you can take these cues straight into your next workout.
1. Set Up the Machine Correctly
Start with the machine, not the weight.
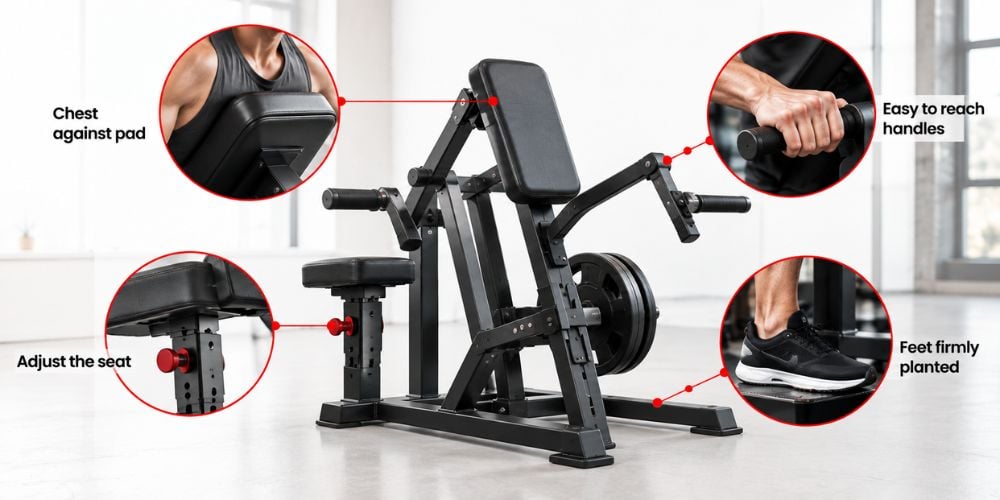
Adjust the seat until your chest sits comfortably against the pad and you can reach the handles without stretching forward. Keep both feet firmly on the floor or foot platform.
The ACE seated-row exercise guide also recommends a stable foot position, chest-pad contact, and a setup that lets you reach the handles without rounding forward.
Quick Setup Check
Check | What to Do |
Seat | Adjust until the handles are easy to reach |
Chest | Keep it firmly against the pad |
Feet | Plant them on the floor or platform |
Weight | Start light to moderate |
Grip | Choose one that feels natural |
Wrists | Keep them in line with your forearms |
Too high or too low? If you need to shrug, lean, or overreach to grab the handles, adjust the seat again.
2. Get Into the Starting Position
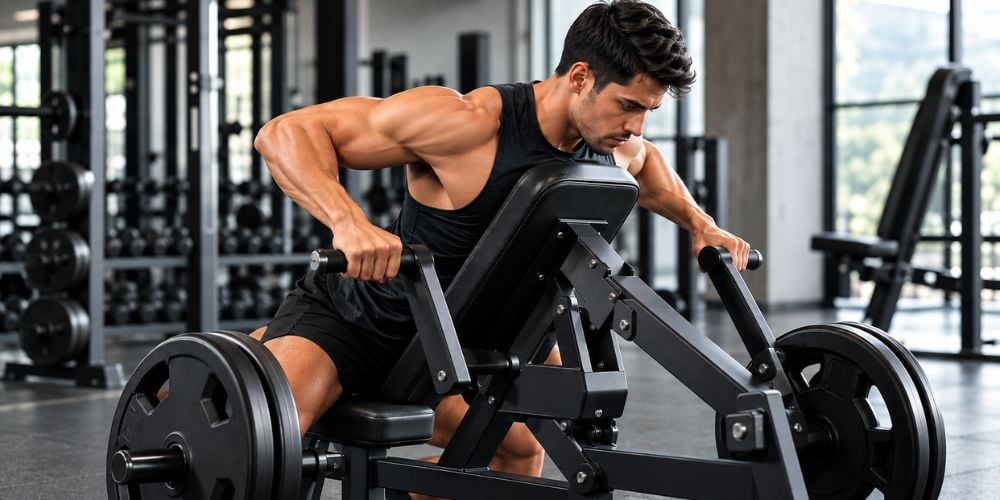
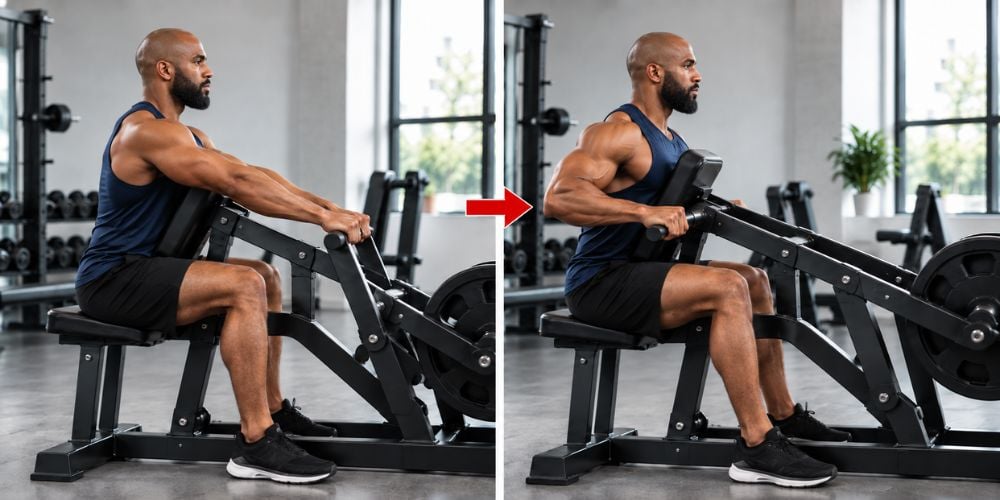
Sit tall and keep your chest against the pad.
Extend your arms naturally in front of you. Keep a slight bend in the elbows rather than forcing them into a hard lock.
Your position should be:
- Chest: against the pad
- Back: neutral
- Core: lightly braced
- Feet: firmly planted
- Arms: extended
- Shoulders: relaxed and away from your ears
Avoid pushing your head forward or rounding your lower back.
I often suggest checking this position before the first rep. If you already feel unstable, fix the setup before you start pulling.
3. Pull the Handles Toward Your Body
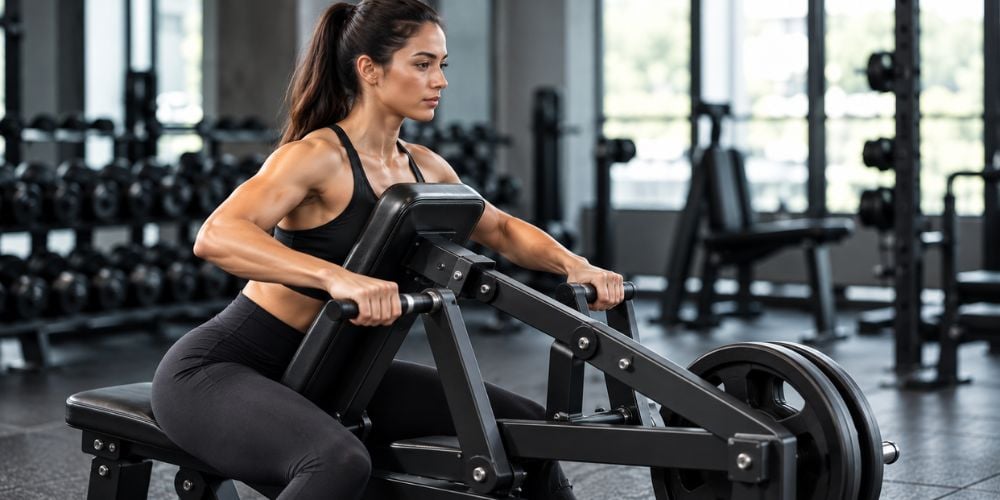
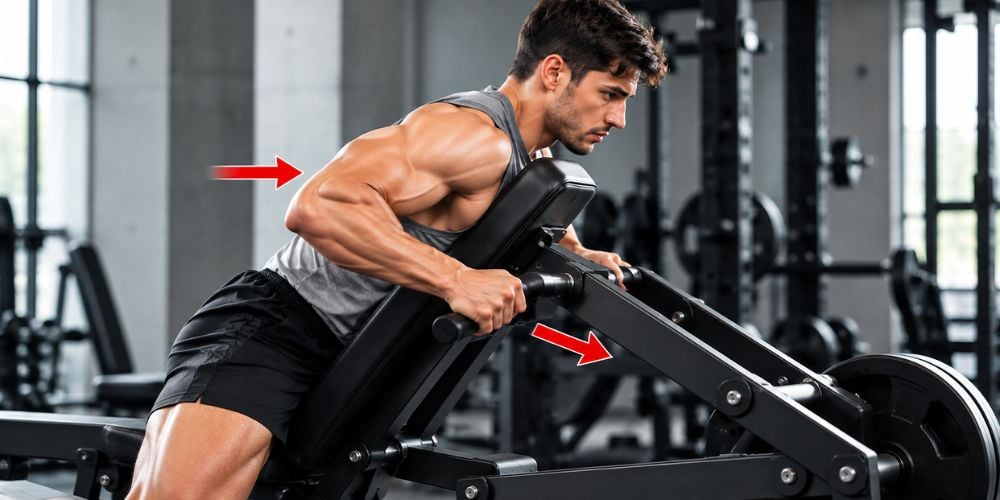
Now row the handles toward your lower ribs or upper waist.
Think about driving your elbows backward instead of simply pulling with your hands. This usually makes it easier to focus on your back.
As you pull:
- Keep your chest on the pad.
- Keep your shoulders down.
- Drive your elbows behind you.
- Squeeze your shoulder blades together.
- Pause briefly at the top.
ACE also advises keeping contact with the chest pad and avoiding a backward lean during a machine row.
Should you pull as far as possible? No. Stop when you reach a strong back contraction without lifting your chest or forcing your shoulders backward.
If you need to jerk the handles to finish the rep, reduce the weight.
4. Lower Weight Slowly
Do not let the weight control the return.
After the pull, extend your arms slowly until you reach the starting position again.
Use this sequence:
- Release the back squeeze gradually.
- Let your shoulder blades move forward naturally.
- Extend your elbows under control.
- Keep your chest against the pad.
- Start the next rep without bouncing.
Aim for roughly two seconds on the lowering phase.
That slower return makes it easier to keep your position instead of rushing from rep to rep.
If you want to compare machines designed for stable rowing positions and smooth resistance, take a look at our rowing machine range. We focus on practical support, natural movement paths, and equipment that lets you concentrate on the rep instead of fighting the machine.
5. Common Chest-Supported Row Mistakes
Most problems come from using too much weight or losing your position.
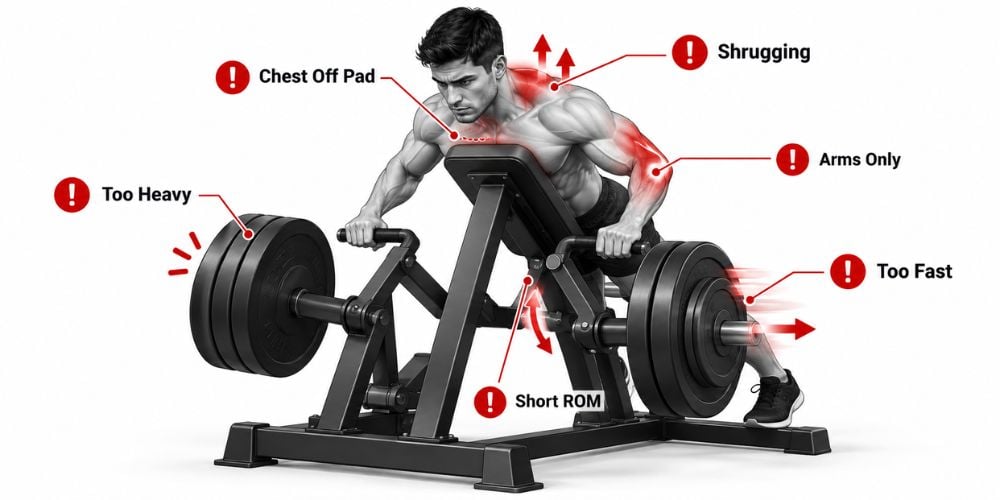
Using Too Much Weight
Heavy weight often shortens your range of motion and encourages momentum.
Choose a load you can control from your first rep to your last.
Lifting Your Chest Off the Pad
Keep your chest supported.
If your torso keeps coming away from the pad, you lose one of the main reasons for doing a chest-supported row.
Shrugging Your Shoulders
Keep your shoulders away from your ears.
Too much shrugging can shift more work toward your upper traps.
Pulling Only With Your Arms
Do not think only about bending your elbows.
Think elbows back, back tight.
Moving Too Fast
Fast reps make momentum easier.
Slow down the pull and the return.
Cutting the Range of Motion Short
Let your arms extend comfortably before starting the next rep.
You do not need to exaggerate the stretch, but avoid tiny partial reps unless they are part of a specific training plan.
6. How Many Sets and Reps Should You Do?
Keep this simple.
Goal | Sets | Reps |
Beginner | 2–3 | 10–12 |
Build Muscle | 3–4 | 8–12 |
General Fitness | 2–4 | 10–15 |
Rest around 60 to 120 seconds between sets for most general workouts.
Use a weight that makes the final few reps challenging without causing your form to break down. If you are new to the exercise, start lighter and add resistance once the movement feels natural.
For broader programming, the American College of Sports Medicine’s 2026 resistance-training guidance emphasizes matching training variables to your goal rather than following one approach for everyone.
Not sure if the weight is right? If you cannot keep your chest on the pad and control the return, go lighter.
7. Chest-Supported Row Grip Options
Different handles can change how the row feels.
There is no single grip you have to use every workout.
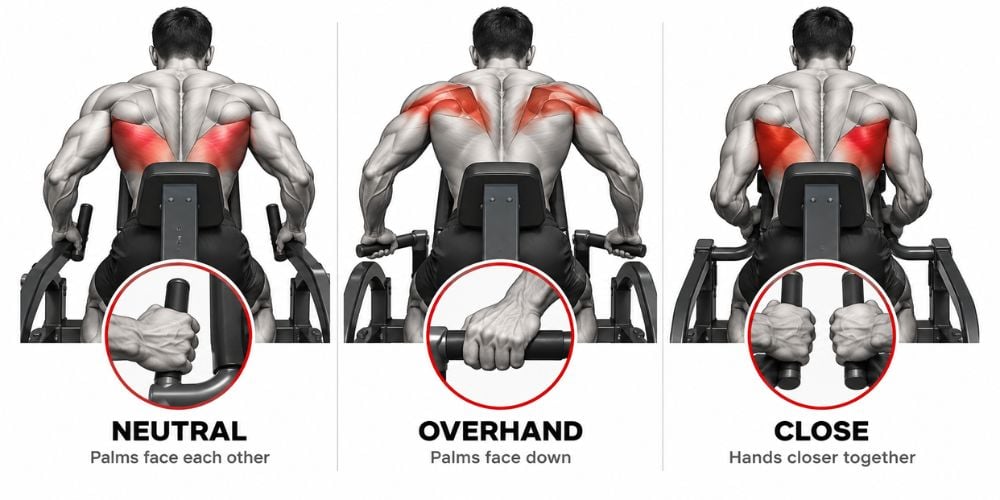
Grip | Hand Position | What You May Notice |
Neutral | Palms facing each other | Comfortable for general back training |
Overhand | Palms facing down | More upper-back and rear-shoulder emphasis |
Close | Hands closer together | Elbows stay closer to your sides |
Neutral Grip
Your palms face each other.
This is a comfortable choice for many people and works well for general back training.
Overhand Grip
Your palms face downward.
Your elbows may travel slightly farther away from your body, which can place more emphasis on your upper back and rear shoulders.
Close Grip
A closer grip usually keeps your elbows nearer your sides.
Many people prefer this position when they want to focus more on pulling through the lats.
Which grip should you choose? Start with the one that keeps your wrists comfortable and lets your shoulders move naturally.
Conclusion
Chest-supported rows work best when you keep them simple. Set the machine correctly, keep your chest on the pad, drive your elbows backward, squeeze your back, and return the weight under control.
Focus on clean reps before chasing heavier weight. A small setup change can often make the whole movement feel better.
If you want to explore rowing and back-training equipment built around stable support and controlled movement, see the strength equipment from YR Fitness. We design our machines to help make everyday movements like rows feel smooth, comfortable, and easy to repeat.
Related articles:



